In todays age the transition, from paper based systems to platforms has been remarkable. As a result its become crucial to have the ability to convert files into formats effortlessly.
One common need for iPhone users is converting a picture into a PDF format. This can be useful for sharing documents or keeping them for reference.
In this article we will provide you with instructions on how to turn a picture into a PDF on your iPhone.
Step 1: Select the App That Works for You
To convert a picture into a PDF on an iPhone the first step is to choose an app. There are apps in the App Store that can assist you in achieving this task.
Among those options Adobe Scan stands out as one of the user friendly choices. Not does Adobe Scan enable you to convert pictures into PDFs.
It also offers additional features such, as document scanning, OCR (Optical Character Recognition) and convenient editing options.
You can easily acquire Adobe Scan from the App Store. Launch it to initiate the conversion process.
Step 2: Take a Picture
Once you’ve opened Adobe Scan you’ll want to take a picture that you’d like to turn into a PDF. Position your iPhone camera over the image.
Wait for the app to automatically recognize and capture it. Alternatively you can manually capture the picture by tapping the shutter button on the screen.
Make sure the picture is well lit and focused for results. If you’re not happy, with how it turned out don’t worry – you can retake it if needed.
Step 3: Adjust and Crop the Image
After capturing the picture Adobe Scan offers options for adjusting and cropping the image. This step is important for removing any elements and ensuring that your PDF looks clean and professional.
Use the cropping tool provided in the app to remove any parts of the picture. You can also rotate it if necessary. Once you’re satisfied, with your adjustments tap “Done” to move on to the step.
Step 4: Convert to PDF
That you have captured and adjusted your picture it’s time to convert it into a PDF using Adobe Scans conversion process.
To save the image as a PDF you can tap either on the “Save PDF” button or the share button depending on which version of the app you have. Adobe Scan will then process the image. Convert it into a PDF file.
The converted PDF will be stored in the document library, within the app allowing you to access and share it from there.
Once you’ve saved your image as a PDF you can conveniently. Share it directly from within the Adobe Scan app. The created PDF file will be kept in the document library of the app making it easily accessible whenever necessary.
Whether you want to email the PDF upload it to a storage service or print it out all these options are a few taps away. Adobe Scans conversion process ensures that your image is transformed into a high quality PDF document for both personal use.
Step 5: Save and Share Your PDF
After converting your picture into a PDF format you have options to save and share it. With Adobe Scan you can choose to save the PDF on your iPhone or upload it to cloud storage for convenient access, across different devices.
If sharing with others is what you intend rest assured that Adobe Scan provides sharing options within its interface.
Sure! Here’s the paraphrased version;
You have options to share it such, as sending it via email iMessage or posting it on social media platforms.
Other Approaches
Although Adobe Scan is a known and reliable app for converting images to PDFs on an iPhone there are methods you can try.
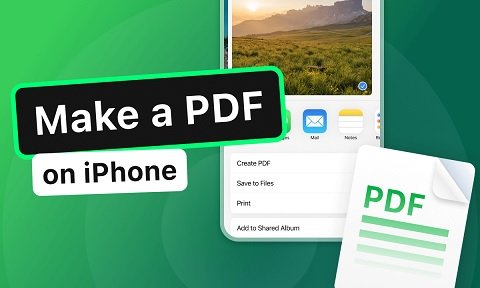
For instance if you’re using an iPhone you can utilize the built in iOS feature called “Print to PDF.” This feature allows you to convert any document, including images into a PDF format.
To utilize this feature effectively open the image you want to convert and tap on the share button. From there select the “Print” option.
On the Print Preview screen use pinch gestures on the thumbnail preview to view the file in full screen mode.
Then tap on the share button again. Choose either “Save PDF to iBooks” or “Save to Files”, in order to convert the image into a PDF.
In Conclusion
Converting an image into a PDF format on an iPhone is an convenient process. By selecting an application capturing and adjusting your picture accordingly converting it into a PDF format efficiently and then saving and sharing your created PDF file with ease; you’ll be able to effortlessly transform any picture into a PDF document using your iPhone.
It all comes down to your needs and preferences when deciding between Adobe Scan and other options, such, as the native iOS feature.
If you’re looking to convert your images into PDFs on your iPhone there are plenty of advantages to enjoy with this file format. It’s easily shareable and accessible making it a convenient choice.
So go ahead. Start transforming your pictures into PDFs on your iPhone today!